
We invited teacher Clare Boreham Kerr to explore Tate’s collection and select an artwork that could inspire SEND-first creative making activities.

Teacher Spotlight: Nnena Kalu
Learn about the work of Turner Prize winner Nnena Kalu and explore line, movement, and sensory-focused making with teacher Clare Boreham Kerr.
About Clare Boreham Kerr

I studied fine art before becoming a teacher and have always been passionate about engaging children with all aspects of visual arts and architecture.
I have been teaching in a SEND school for 20 years and became an art specialist teacher a decade ago. This enabled me to immerse myself in SEND arts education. I worked alongside a range of artists through Creative Partnerships, Baltic Stars and other local initiatives, and achieved two gold Arts Marks. I have co-led local Laing gallery based CPD for teachers (PATERN), participated in the NSEAD anti-ableist special interest group and have contributed to the NSEAD AD magazine and AccessArt.
For me, art making processes are as important as the outcome. As an art teacher, I aim to provide learners with mindful, expressive, and experimental art-making experiences that foster a sense of 'playfulness.' My favourite art is where the process and play IS the outcome!
About the artwork

Artwork
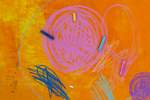
Drawing 25
Nnena Kalu
2022

Nnena Kalu’s practice is driven by rhythm and repetition that guides her movements and shapes her environments. The work was made by the artist during a live drawing performance. She began by creating an initial first layer of drawing and mark-making in fine liner pen, building up repeated circular motions. She then added a second layer to the works, working across both drawings at the same time, a method typical to her practice. Kalu's presence can be perceived in the drawings which record both the span of the artist’s arm and the traces of her movement.
"Nnena’s drawings and sculptures are full of kinetic movement. Lines rhythmically dance, circle and soar."
Clare Boreham Kerr
Starting Points
These prompts, devised by Clare, model the different ways she would approach supporting her students to explore Drawing 25. You could choose one or two that feel the most relevant to your classroom and your young people.
"Engaging with materials, feeling their texture and listening to the sounds they produce, such as the scrape of charcoal on paper, can be an immersive experience."
Clare Boreham Kerr
Medium and materials:
- What materials do you think Nnena uses in her sculptures and drawings?
- What ideas or feelings can you see, hear, feel in the drawings and in the sculptures?
- Do the drawings and sculptures share anything? What might they say to each other?
- How do they relate to disco music?
Texture and the senses:
- What do you imagine Nnena is feeling through her senses when she makes?
- How does making a particular drawing or sculpture lead her to move her body and hands?
- Think about the materials she chooses: What might she hear when not listening to music?

Colour and Composition:
- What do you notice in how Nnena composes her drawings and sculptures?
- Follow the journeys the line take. How do they repeat, diverge, differ and layer?
- What do you notice about the colours Nnena chooses in different drawings and sculptures?
Scale and proportion:
- Why do you think Nnena makes such large pieces of work? How does this help the lines evolve into form?
Emotions:
- Imagine making drawing and sculptures in the way Nnena makes, taking a line for an endless journey, guiding and repeating where those lines travel. How do you think Nnena feels while she is making?
- How do the lines, colours and forms make you feel when you look at them?

Make
In this suite of resources devised by Clare, teachers are invited to select sensory activities that will resonate with their young people, and students are invited to investigate line journeys, their senses, and rhythmic movement.
"For many artists, and craft makers, the act of making is just as significant as the finished piece itself."
Clare Boreham Kerr
Getting started
There are many ways to approach this project. Depending on your learners, you may set up an activity ready to interact with directly, with minimal prior discussion. You could include images of Nnena and her work to refer to in the moment, or start with a more formal discussion of her style and approaches.
There is a wide range of activities in this resource -- two-step drawing, light and projection, mono-printing, collage, and wrapping/sculpting -- pick what works best for your students, or try them all in a sequence. The materials needed for each activity are listed below.
You will need
For drawing and mono-print activities:
- Oil pastels, chalks, pencils
- Large card, cartridge paper or coloured sugar paper. We use large pieces of off cut card from a local packaging factory which would otherwise go to landfill, cereal or cardboard boxes
- Sticks, pebbles, other natural materials
- Poster paint
- Ink rollers – different widths
For mono-print only:
- Printer ink base plate: table top, Perspex of any size, tuff tray, laminated card.
- Block printing ink for laminated card or Perspex, poster paint for larger base plates such as a table top or tuff tray
For projection activities:
- Over head projector / torches/ lamp/ sunny window
- Cellophane
- Transparent coloured items eg magnetic tiles
- Laminating pouches / laminator
- Black whiteboard pens
- Wool, strips of material, masking tape (plain or coloured)
- Optional for all activities: bumpy textured plastic drawer liner/textured wall paper, sticky cling film, re-used sparkly shiny wool, tinsel, glitter, fabric strips
"With Nnena's work, you can really see her flow and her process. She creates a journey with her lines, and sometimes she layers a completely different journey on top."
Clare Boreham Kerr
Create a background
Roller Disco! Duration: 20 minutes
- Place poster paint or ink in trays, or pre-roll it directly onto paper or card. The colours could be warm / cool themed, or mixed tints, tones and shades.
- Use ink rollers to cover your backgrounds. Work together, covering the whole area as a group - roll rhythmically to music if your pupils wish!

"Experiencing different materials and methods from a sensory perspective helps to engage learners whilst also allowing teachers to learn more about sensory preferences they may have."
Clare Boreham Kerr
Drawings
Duration: 20 minutes
- Choose 3-5 colours which will stand out against the painted backgrounds or inspired by different drawings by Nnena. You might link choices to colour theory work around warm and cool colours, complementary colours, tints, tones and shades.
- Place your pre-painted paper on floor, wall or even on the underside a table, so you could lie on your back to draw if you wished.

3. Practice making big shapes and circles with your arms or your body, trying to reach every corner of your paper. Repeat your movements over and over again, moving as if dancing.
4. Tape your paper over textured paper and continue your line's journey – how is it different? Is the sound different on different surfaces?
What do you hear? What do you feel?
What route will your lines take across the page? Where will your lines collect and become tightly squeezed? Where might they diverge?
Which colours will take a lead?
Will you start a new journey to travel and layer over the top? How will it join, flow and repeat?
Light and Projection

Duration: 20 minutes
- Using a light box or an overhead projector, experiment with items to make lines. Anything transparent and colourful might inspire you: pieces of cellophane, magnetic tiles, pieces of string and or other materials!
- Use white board pens to draw line journeys on clear Perspex, transparent tiles or empty laminated pouches.
- Layer these onto your light box collages and see how the line journeys overlap and shift.
4. You could take digital photos of your light projection artwork and later choose pictures to edit with colours and filters. What would happen if you projected those photos?
Note: some projectors can be hot to touch, make sure only adults use them, and avoid using flammable materials


Make a mono-print
Duration: 30 minutes
- Create the surface for your ink. These can be as large or small as suits the setting. Use a tuff tray, tabletop, large pieces of Perspex on the floor, or simply laminate some A4 card for tabletop work.
- Roll block ink to cover your surface. (Larger surfaces may need to be sprayed lightly with a water spray to stop them drying out.)
- Draw rhythmic circular lines and spirals into the ink using different tools such as sticks or glue spreaders.
- Lay paper on top to take a print. Peel the paper off and look at your rhythmic lines.


5. Alternatively, lay paper onto an inked base and draw spirals and line journeys with pencils or biro pens onto the reverse (un-inked) side of the paper. This can work better with slightly dryer ink.
6. Try combining the two methods: first, mark make onto the inked surface, and then on the back of the paper after you've placed it in the ink. Experiment with different coloured paper, or paper that has been drawn on with oil pastels. You could even layer different colours of ink if you had multiple printing surfaces!
"Capturing colours and creating and controlling novel forms can lead to joy, excitement, feelings of calm or a deep cognitive absorption which may shape the direction of students' work."
Clare Boreham Kerr
Extend
Duration: 30 minutes
Further explore Kalu's practice through wrapping sculptures, either individually or in groups. You could wrap cut up junk boxes, or collect sticks and pebbles. Cereal boxes can be turned inside out and reconstructed again to either use unpainted or painted ahead of wrapping. Use string, wool, tape, or whatever materials appeal to your students.
As with the drawing, children or teachers could pre plan specific colours and textures used in their sculpture based on colour theory learning or just enjoy free choice ‘in the moment’ exploration.
Will you layer colours? Will you wrap more in one area than another? Can you change the shape of the base object by adding more and more wraps and knots? How can you add small pops of colour?

Make it sensory
Additional options for sensory learners
Stained Glass Lines and Umbrellas
Collect many different materials: wool threads, finely cut strips of paper, pulled textiles such as hessian, strips of cellophane and tin foil and place within a laminating pouch. Press well before laminating (adults only, safely!). Sticky carpet protector clingfilm is an alternative medium to stick collage pieces to.
Using a sunny window, lamps, an overhead projector, or a torch, explore the lines and colours.
How have you made lines? What colours have you chosen?
Can you trace the lines with a finger, or with your eyes? What journeys do you take?

Cut up the laminating sheets and join these shapes for a multi-sensory mobile which lights can shine through. Make your mobile dance in front of a window!
You could also use PVA glue on laminated cards to create sheets of transparent / translucent ‘material’ with glitter, coloured ink/ paint, collaged tissue paper layers. When dry these can be stuck to windows and or cut up for mobiles.

Using PVA glue, collage a transparent umbrella with pieces of the laminated pouches, laminated cards, or different pieces of cellophane, alongside any other sparkly or shiny materials. Hang pieces of these from the umbrella edges, alongside wool, tape and other strips of material to create a magical sensory swirling light umbrella.
Clare's Picks
Clare has selected additional works from the Tate collection that relate to this SEND-first, materials-focused approach. Use them as inspiration or bring them into your classroom.


How to use Teacher Spotlights
This resource offers a modular flexible approach: use the prompts and activities as a full sequence of lessons, choose a single idea to adapt for your classroom.
Teacher Spotlight resources are designed to increase your confidence in using Tate’s evolving collection to engage with big conversations in your classroom. Each resource is co-created with an expert teacher and shares real world examples of how they have successfully used the artworks in their teaching.
You are invited to draw inspiration and nourish your practice by seeing how other teachers approach working with artists and artworks in the classroom.
All images © Hydar Dewachi


