Our cleaning tests on mock-ups, which represent (to the best of our abilities) the surface of the sculpture, showed that the best technique for removing surface soiling is using a microfiber cloth moistened with a mixture of surfactant (essentially a detergent or soap), and a chelator (a type of molecule that can bind to, and remove certain parts of soil) called triammonium citrate. This type of solution, prepared at a very dilute concentration, is very effective for removal of soil – in fact both surfactants and chelators are commonly found in laundry detergents.
It’s important to remember that our mock-ups are just a best-attempt at a representation of the actual artwork. In the end, we might find that the soil on the actual sculpture behaves very differently from that on our mock-ups and it may be easier or more difficult to remove. For this reason, Gates began her tests in a discrete area of the sculpture using just water on a microfiber cloth. This was not particularly effective; it seemed that the soil on the sculpture was slightly oily. Gates next tested a dilute solution of just the surfactant, and also one which contained the chelator only. The two liquids were slightly more effective than water alone, but still did not remove the soil completely. After each test, Gates also cleared the area with water, to ensure that surfactant or chelator is not left on the plastic surface.
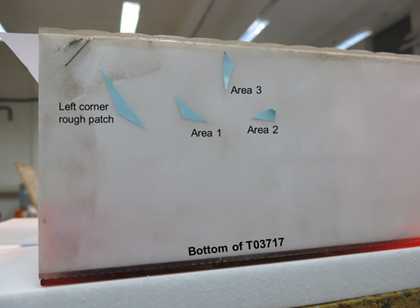
The bottom of Op Structure which is covered in a light layer of surface soiling. The blue arrows point to areas which selected for some of the cleaning tests.
© Michael Dillon
Photo © Tate
Next, we tested the solution containing both surfactant and chelator. Once again, Gates used a microfiber cloth to wipe the surface using this mixture, and then cleared the area with some water. The white plastic on the side of the object, where the tests were being carried out, was visibly brighter. Under the high resolution digital microscope, we could see that both the small, black soil particles and the greasy substance were being removed from the plastic. Unlike our newly-purchased, pristine Perspex mock-up sheets, the original sculpture had many small scratches on its surface. It seems that after joining the plastic sheets together, Dillon wiped off residual adhesive using a rough cloth. Under the microscope, we could easily see these scratches. As far as we can tell, new scratches were not being introduced by the cleaning strategy we chose. After the cleaning was finished, we found that the glossiness of the white plastic had increased in 2/3 of the areas we tested, and remained unchanged in the remaining areas.
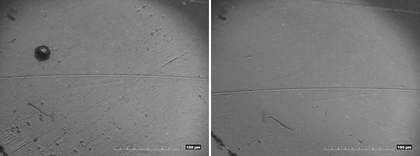
High resolution digital microscopy images of the surface of Op Structure before (left) and after (right) it was cleaned using a dilute solution of surfactant and chelator. Under 1000 x magnification we can see a soil particle and a greasy material on the pre-cleaned surface. Both have been removed by the conservation treatment without the introduction of new scratches.
Based on our mock-up tests, we believed that removing the labels from the white plastic sheets would be the most difficult aspect of the conservation treatment. These labels were very old, and could not be removed by simply peeling from the surface. Gates first tried this type of removal (mechanical removal) by gently pushing the sticker off with a bamboo stick. When this failed, we tested the liquid which had performed best during the mock-up testing phase – an equal-parts mixture of isopropyl alcohol and water (essentially, common rubbing alcohol). To remove the sticker, Gates soaked cotton swabs in the rubbing alcohol and placed them on top of the sticker. After 3-5 minutes, the cotton was removed and the sticker was tested with a bamboo stick again. The really old, unlabelled sticker could be easily removed after just one application of the cleaning liquid! In our mock-up tests, stickers with a similar type of adhesive required approximately one hour of soaking to be removed. It is possible that the glue of the sticker on Op Structure was much more degraded than that of the mock-up stickers. When adhesives become severely degraded, they can sometimes be much easier to dissolve than when they are relatively fresh.
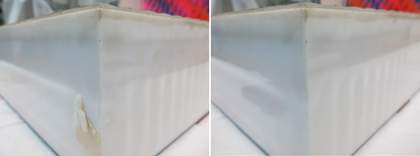
Removal of the blank label with highly degraded rubber-based adhesive. The paper backing on this sticker had been partially removed in the past and wetting of the surface was very fast. The degraded adhesive swelled easily in a 1:1 mixture of water and 2-propanol.
The second sticker, applied by the Conservation Department in the 1980s behaved similarly to the stickers on our mock-ups. It was also removed with rubbing alcohol applied on cotton swabs, but required 2-3 applications to fully soften the glue. With both labels removed, the transparent, scalloped sheet covering the front of the sculpture was gently cleaned with a microfiber cloth and water. The second object by Dillon, also called Op Structure (Tate T03718) was surface cleaned by the same approach. Neither box could not be opened to remove the light soiling from the inside.
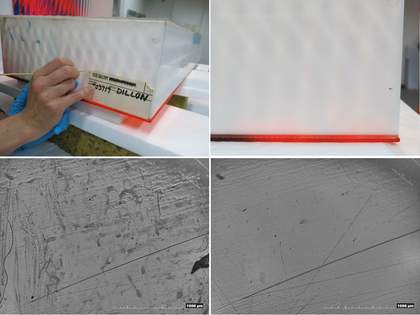
Removal of the second, newer sticker from Op Structure. After the sticker was removed, we found a black marker notch on the plastic (top right image). It was not clear if this mark was original so the conservator decided not to remove it. The bottom images show the surface under the high resolution digital microscope before (bottom left) and after (bottom right) removal of the acrylate-based adhesive.
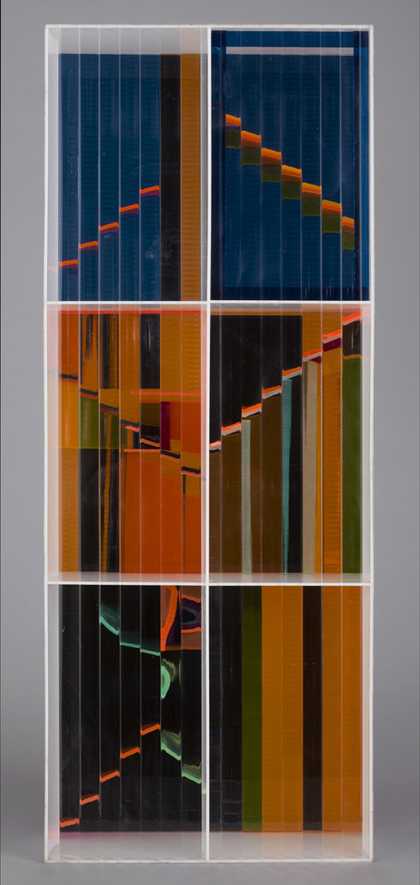
The front side of Michael Dillon’s plastic sculpture Op Structure 1967 after treatment by Tate conservator Gates Sofer.
© Michael Dillon
Photo © Tate
Lora Angelova, Gates Sofer, Bronwyn Ormsby
February 2017
