"The conscientious designer, does not himself design at all but rather give the object-to-be a chance to design itself."
Anni Albers, 1965

Anni Albers Black White Yellow 1926, re-woven 1965 Lent by The Metropolitan Museum of Art, Purchase, Everfast Fabrics Inc. and Edward C. Moore Jr. Gift, 1969 (69.134) © 2018 The Josef and Anni Albers Foundation/Artists Rights Society (ARS), New York/DACS, London

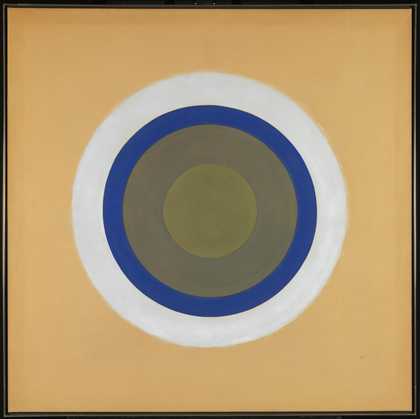
Anni Albers, Intersecting, 1962 Josef Albers Museum Quadrat Bottrop © 2018 The Josef and Anni Albers Foundation/Artists Rights Society (ARS), New York/DACS, London

Anni Albers, Open Letter, 1958 The Josef and Anni Albers Foundation © 2018 The Josef and Anni Albers Foundation/Artists Rights Society (ARS), New York/DACS, London
Are you ready to weave like Anni Albers?
- A loom*
- A warping mill
- A raddle
- A reed
- Cross sticks
- String
- Cardboard
- A selection of thread
- A threading tool
- A reeding tool
- Scissors
*There are a number of venues throughout the country that offer loom hire or workshops, such as, The London Loom, The Weave Shed, or The Handweavers Studio among others. We have also teamed up with The Squid Ink Co. in Glasgow, Scotland who have created two beginners weaving kits exclusive to Tate, to help you get started.
First sketch out you ideas using some of the key themes in Albers’ work. You could take inspiration from the artwork above. Next, create a threading plan. This will be the base for your pattern.
Then, prepare your threads on the warping mill. This is a tool used to get all the threads the right length and in the right order, ready for the loom.
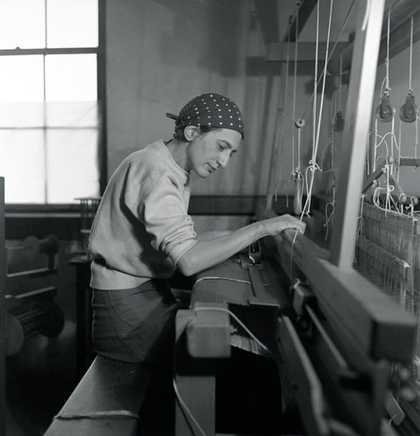
Now you have your threads in order, you are ready to dress the loom. Use a raddle to space out the threads so they are the right width apart for when you start weaving. This will form the warp, which is the threads that stretch vertically down the loom. The warp is one of the two base components in a piece of fabric.
Next, wind the warp around the back beam to keep them neat and tidy. Place a sheet of paper in between each layer of the threads to keep them from tangling. Now get your cross sticks, these are essential for keeping the threads in the right order.
Once that’s ready bring the warp threads up to the back of the loom and hang them up. The next stage is to thread the loom, so take all the threads thought the small metal things, called the heddles. Use a reed to space out the threads while you weave the fabric.
Once you finish reeding the warp, tie it onto the stick at the front of the loom. Now that you’ve finished tying on, you’re ready to start weaving and use the box to program your pattern.
First put the yarn into the shuttle. This piece of yarn is called the weft and will be woven horizontally through the vertical warp threads. This along with the warp form the two base components of a piece of fabric.
Next pass the shuttle through the shed. The shed is the temporary space between the upper and lower warp threads. After the shuttle has gone through, the shed is closed and opened again with the foot pedals.
Each time the shuttle is passed through, pull the reed to secure the weft. Wind the warp on to create more space for the weaving as it grows. This is repeated over and over until we have a weaving. Slowness was a virtue to her and a key ingredient in allowing for the experimentation which defines her work.
Once your weave is complete, remove it by cutting it out of the loom and cut away any stray threads.